Showing posts with label linux. Show all posts

Friday, March 1, 2013

ll as an alias to ls -lrt

Ok from my recent experience working on AIX servers, it was always handy to do an ll, an abbreviation of the 'ls -lrt' command.

It is very easy to create an alias of a command as something else:
alias ll="ls -l"
Remember not to leave any spaces (maybe even do single quote instead of double quotes). It could also be more useful to put aliases in .bash_aliases file and keep your .bashrc cleaner. 

Sunday, January 15, 2012

NAS 110/220/440 part5: Download manager (Debian)


This is the last of the series that describe how the NAS can behave as a linux server (DLNA, webserver, bittorent). About the end of this tutorial you should be at about the 75% of your space in the NAS (issue the "df -h" command).

Saturday, January 14, 2012

NAS 110/220/440 part 4: Bittorent client to NAS 110, 220, 440 (Debian linux)


Transmission (headless server)

Transmission is great, but in lenny you get a very, very old version. There is way to get the latest or from backports but I would suggest compiling the latest from trunk. I have compiled the 2 packages needed...
And they are right here:


Older version:
libevent-2.0.16_1-1_armel.deb
transmission_2.42-1_armel.deb

Newer version:
1. transmission_2.77-1_armel.deb
2. libevent_2.0.21-1_armel.deb
3. (not sure it is needed, but here you go) intltool_0.50.2-2_all.deb

A simple dpkg -i *.deb should do the trick. Just follow the settings part for all the install methods below...


Otherwise:

  • Install transmission (from backports)
    nano /etc/apt/sources.list
    # Add those lines:
    • # Backports repository
      deb http://backports.debian.org/debian-backports lenny-backports main
    aptitude update
    aptitude install libcurl3-gnutls libevent-1.4-2
    Then download from here (common, cli, daemon)
    dpkg -i transmission-common_1.77-1~bpo50+2_all.deb
    dpkg -i transmission-daemon_1.77-1~bpo50+2_armel.deb
    dpkg -i transmission-cli_1.77-1~bpo50+2_armel.deb

NAS 110/220/440 part 3: Install a webserver (lighttpd, mysql or sqlite, php5)

php

Well, this is easy...
  • Install webserver, sqlite, php5
    aptitude install lighttpd php5-cgi php5-cli php5-sqlite

Monday, January 9, 2012

NAS 110/220/440 part 2: Install minidlna in Blackarmor 110 (linux debian)


Well, following previous post that we installed in our little NAS a linux distribution, why not use our little NAS as a DLNA Server? I personally prefer MiniDLNA as it uses less resources and less dependencies. But it is up to you.

I also have a minidlna deb file ready for your needs (so as not to compile everything from scratch). However you will need to configure the minidlna.init.script (put it in init.d folder) and the minidlna.conf files.
(minidlna_1.0.22-9-1-2011-1_armel.deb)

In case you want some newer packages/requirements and you don;t want to compile them for yourself, here they are:


1. minidlna.1.0.25-1_armel
2gettext_0.18.2-1_armel
3. m4_1.4.16-1_armel
4. automake_1.13.1-1_armel
5. autoconf_2.69-1_armel
6. checkinstall_1.6.2-1_armel

Update: Please click on one ad (no more as it may be considered as fake) in order to support my time compiling and finding the errors in compiling these packages. Thanks. :)

Delete everything in a disk... even the GPT partition table

First of all, fire up the gparted live cd/usb and load gparted (info here).

Delete every single partition from your drive one by one. (delete and apply).Close gparted app but don;t reboot
Now the hard part will be to delete the GPT partition table, that has various copied along the disk.
When the kernel unintentionally identifies a disk's GPT (GNU partition table) it can be hard to get that partition table removed since it is repeated several times accross the disk space. The trick is to change the partition table on disk to BSD; the partition table that is most commonly used on x86 systems. Fire up terminal Change patrition table to BSD

parted /dev/sdjm mklabel bsd 

Next, if you also require to remove the BSD label use the well known trick: Remove BSD label

sudo dd bs=1k count=1 if=/dev/zero of=/dev/sdjm 

Finally rescan partitions to update the kernel state. Rescan partitions

partprobe

Saturday, January 7, 2012

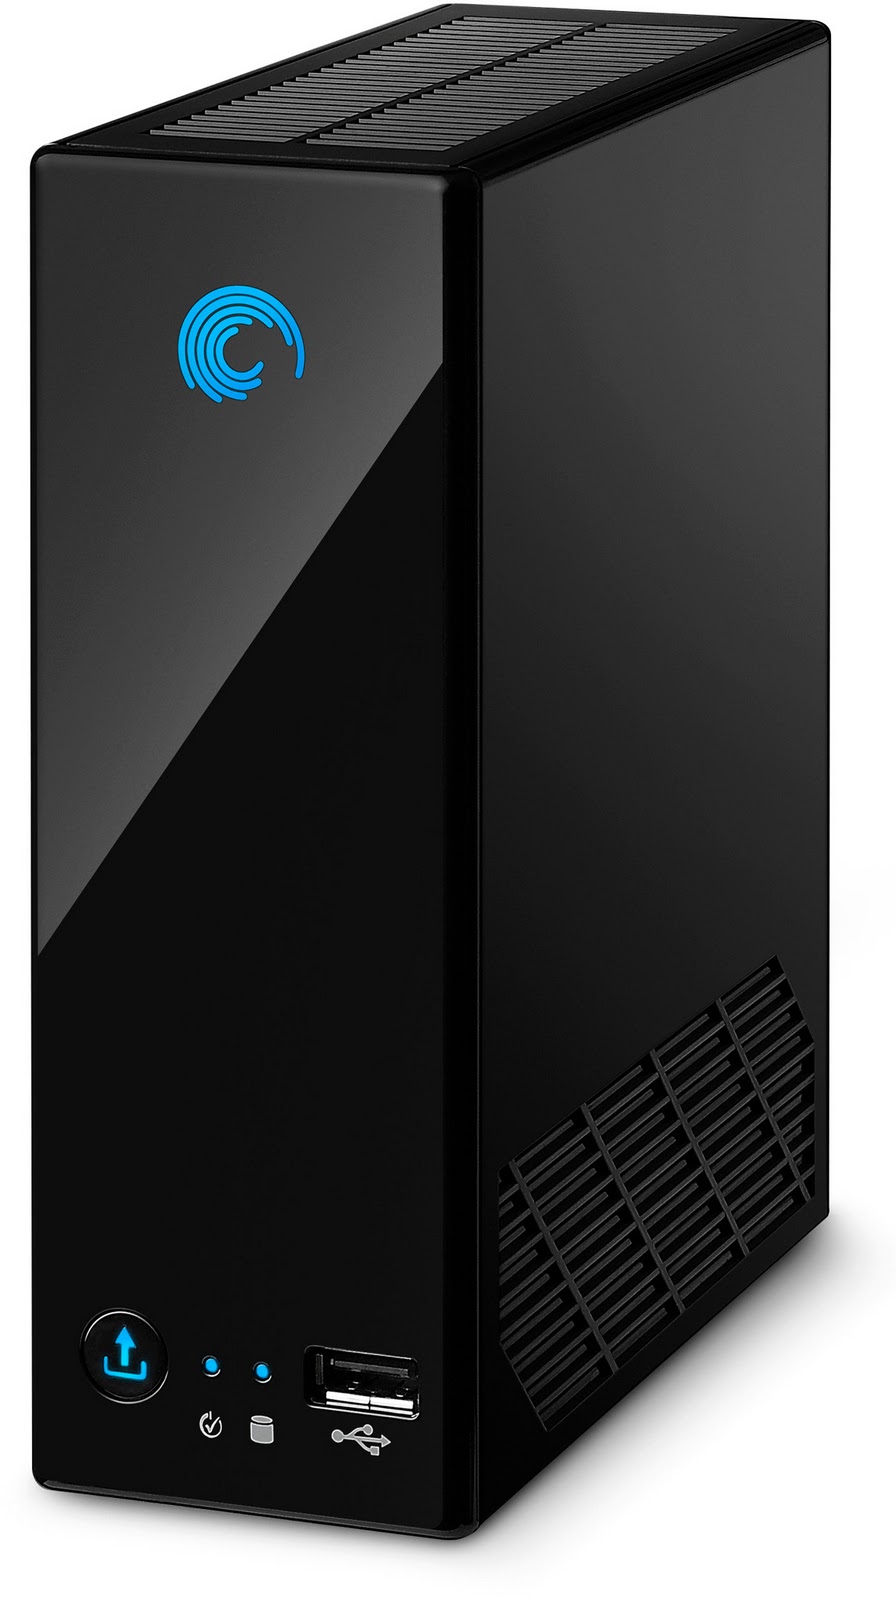
Nas 110/220/440 Part 1: Install Debian Lenny in NAS 110 BlackArmor Seagate

  The info below will void your warranty... I will not be held responsible for any damage caused to your unit.
(although rest assured, there are many who have done it and nothing bad has happened... but still you are taking chances, just take everything as I say, step by step and you will be great)
We will need PuTTY. Download it here.

1. Enable SSH on the Seagate Blackarmor 110 NAS

  •  1. Download the 'unofficial' service pack (SP42) and use the manual firmware upgrade process through the web interface:
     http://www.noerenberg.de/hajo/pub/sg2000-2000.1337.sp42.img

    Update: You have to rename the file to match the major model number of your NAS (sg1000-1000.1337.sp42.img for the 1xx series, sg4000-4000.1337.sp42.img for the 4xx series). (rename the file to correspond your NAS!)

Thursday, June 9, 2011

Plymouth startup with fglrx

This is by no means a fix for supporting your resolution, just a workaround to see a graphical startup rather than lines...


Start with sudo gedit /etc/default/grub
Edit grub line GRUB_CMDLINE_LINUX_DEFAULT="quiet splash vga=792"
For vga codes -the essential part- look here
Then, echo FRAMEBUFFER=y | sudo tee /etc/initramfs-tools/conf.d/splash

Last but not least sudo update-grub

To choose from alternative plymouth startups
sudo update-alternatives --config default.plymouth
sudo update-initramfs -u

link

Tuesday, June 7, 2011

Flash in ubuntu... no audio problem solved

Flash defaults in 0 alsa. But 0 could be another card or audio output. That is the only problem that you can get video but no audio in flash in Ubuntu.

Pavucontrol did not see the default card anymore, so I had to check for another solution (I must not have been thinking properly as pulse audio is THE solution for everything... otherwise flash locks the ALSA device)so reverse what we have just said...

First of all uninstall anything that has to do with alsa and leave pulse do all its magic.
Then sudo gedit /etc/asound.conf so as to tell each and every process to output to pulseAudio (all the other programs do so, but flash doesn't!!!)
Insert those stuff

pcm.pulse {
type pulse
}
ctl.pulse {
type pulse
}
pcm.!default {
type pulse
}
ctl.!default {
type pulse
}


Well if it is not ok continue by issuing in terminal gstreamer-properties and choosing pulse audio as output audio plugin.
Everything should be ok... We simply told that everything that uses audio codecs should pulse. Then do whatever you want with pavucontrol
If still does not work, check with "pulseaudio device chooser" in applications->Sound & Video, and from there select your default sink (I made it start at startup in preferences).

==============================
Old version through ALSA

So, I decided to update my Ubuntu machine. It's been a while that my video card was not supported (HD6850) (old one died unexpectedly)
AMD has released its own drivers, so I decided to go back to my beloved desktop.
I installed kernel 2.6.35 as, let's face it, works with everything; I installed the video drivers; And then I decided to work to support vaapi.
While installing something must have gone wrong as I could no longer hear sound from YouTube.
Flash is in the multiverse (check repositories) in its nswrapper 32bit way. Having installed that, I can say that the next step was to change my default sound card.

Although there must be a way to do it through alsamixer, I preferred the terminal.
So i typed cat /proc/asound/modules
The result was
0 snd_hda_intel
1 snd_cmipci
And the first one was my AMD HDMI audio, which I did not want it to be first.

So I entered in sudo gedit /etc/modprobe.d/alsa-base.conf and added these lines...

#Keep pci card to default as first sound card
options snd_cmipci index=0
options snd_hda_intel index=1


Now everything works as it should..
Hope I have helped.

Thursday, September 16, 2010

Add ttf fonts in ubuntu

Ok, so you've downloaded a great font (what about this one... ok maybe not) and you don't know how to install in Ubuntu?

Fear no more. Just sudo cp your file to /usr/share/fonts and then issue this command: sudo fc-cache -f -v

Disabling 'recent documents' in Ubuntu

To disable, open up a Terminal window by clicking on Application \ Accessories \ Terminal from the top panel menu and enter the following set of commands:

rm ~/.recently-used.xbel

followed by…

touch ~/.recently-used.xbel

…one more (after entering the following command, you will be prompted to enter your password)

sudo chattr +i ~/.recently-used.xbel

Next, clear the Recent Documents list as described above.
Now when you check Places \ Recent Documents again, it should now be greyed out and disabled.
No more displaying "those" recently viewed documents (..aahem).

To explain what occurred to disable Recent Documents using the above set of commands:
We first removed the file recently-used.xbel (located in the root of your Home directory by using the rm command (this file is used to store the list of documents)
Next we re-created the file using the touch command.
Then we changed the attribute of the file to make it inaccessible using the command chattr +i.
If you decide someday that you want to enable displaying of Recent Documents, just run the following command:

sudo chattr -i ~/.recently-used.xbel

The view will remain greyed out and disabled until you access a document, which will cause it to start displaying viewed documents.
Oh yeah, one more thing, when you do enable Recent Documents, all documents that you accessed when it was disabled, will be visible. So make sure you clear them out again….otherwise everyone will be able to see what you were trying to hide in the first place
Source

Wednesday, July 21, 2010

Change buttons in menu bar in ubuntu

So new Ubuntu goes the Apple way trying to modify the button order on the top bar. In case you don't like this setting and you want it Windows® style then open a terminal and type gconf-editor
Then search for (apps/metacity/general/button_layout) and set to menu:minimize,maximize,close
Upon hitting enter changes should take immediate effect.

Sunday, July 4, 2010

Change your MAC address

Most people only think in terms of IP addresses assigned to a computer. With the help of the Arp command, IP addresses are translated to MAC addresses which, in turn, allow the machine to speak to the network. Your MAC address is set by the manufacturer. In this article I am going to show you a very handy GTK tool that allows you to change that MAC address.


Why change?

There are reasons why you would want to change a MAC address on a machine. Some of the reasons are:
Get past a MAC filtering device.
Sniffing connections on a network.
Obfuscate the manufacturer-created MAC address.

Many reasons people change MAC addresses are less-than-friendly. I am, in no way, advocating such acts. I only show this tool for those reasons that are, as we say, “above board”. For example. I have, only rarely, seen an instance where somehow the MAC address of a built-in network card was the same as the MAC address of a router. Because of this that machine was unable to get online. There were two ways around this: Purchase a new NIC or change the MAC address of the built-in NIC. For the latter reason, I took advantage of MACchanger-GTK.

Installation

Installation is simple:
Open up your Add/Remove Software utility.
Search for “macchanger” (no quotes).
Select MACchanger-GTK for installation (this will pick up any requirements necessary).
Click Apply to install.

That’s it. You are ready to use MACchanger-GTK.

Usage


Figure 1

Using this tool is simple. But you will not find a menu entry for MACchanger-GTK. Instead you have to start it from either the command line (with the command macchanger-gtk) or by hitting F2 and then entering macchanger-gtk. Once open you will see a very simple interface (see Figure 1) ready to change your MAC address. To do this follow these steps:

1. Select your Network Interface from the drop down.

2. Click See current MAC (this will display your address in a new window).

3. Click the Known vendor button. If your NIC is detected with enough information you can then change the address to another address of the same manufacturer. If not, your best bet is to go with Random.

4. From the Options drop down select one of the methods for changing your address.

5. Click Change MAC.

That will change the MAC address of your network interface card. Once changed you can then click the Quit button to dismiss the MACchanger-Gtk window.

Final thoughts

I can’t stress enough that this tool should only be used for legitimate, legal reasons. Do not attempt to use MACchanger-GTK for any purpose that would land you in trouble. And, should you do so, Ghacks or the author is not, in any way, responsible for your actions.

On those occasions that you do need to change a MAC address (for the right reasons) it’s good to know you have a simple GUI tool in Linux to do the job.

Source

Monday, April 12, 2010

Suspend and lock command

Ok, so you're used to locking your system with Super+L in Windows and you can't find a way to do so in Ubuntu.

Well compiz has feature which you can set a number of commands with a certain key binding.
Open a terminal and type ccsm.

Then, at the first command line type gnome-screensaver-command --lock and at the second one dbus-send --print-reply --system --dest=org.freedesktop.DeviceKit.Power /org/freedesktop/DeviceKit/Power org.freedesktop.DeviceKit.Power.Suspend. Go to the next tab (Key binding) and at Run command 0 grab the combination Super+L. Do the same for the suspend function at the second key binding (I've set it to Super+Ctrl+S).

And there you go. Lock and Suspend with a press of button (sort of)...

Saturday, September 12, 2009

UTC time in Ubuntu and Windows

Ok, so you accidentally selected that the time in Ubuntu is UTC and now whenever you log in to Windows, that stupid (stupid for not having an option to select from) assumes that the clock from BIOS is @ localtime. Anyway, just
sudo gedit /etc/default/rcS


And edit UTC=yes to UTC=no. Simple as that. Next time you log in to Ubuntu it will show for a while (presumably it will get the right time in a few minutes while checking for the the right one in ntp.ubuntu.com) the old one. If you want to force it to show the right one right away then you should just
ntpdate ntp.ubuntu.com

Sunday, August 23, 2009

Reset a forgotten root password with a live CD

Info from here
If you have forgotten the root password of a system, you can very easily reset it with a live CD. Any live Linux cd from standard Linux distros such a ubuntu , knoppix etc can be used.

Boot the system with the live CD. Open a terminal and use dmesg command to find out the hard disk. The ide hard disk are generally named as hda, hdb etc. SATA and SCSI disks are named sda sdb etc.
You have to find out where your root partitions is mounted. You can use cfdisk to find out the partitions.
$sudo cfdisk /dev/sda

You can examine the screen and find out the Linux partitions . If you have multiple installations , this can be tricky. You can quit from cfdisk and return to terminal. Now, try to mount the desired partition into some directory. ( Assuming that you Linux partition is /dev/sda2 , the following commands are described.)
Acquire root powers on the terminal with ( in the case of ubuntu live cd which I use)
$sudo su
# mount /dev/sda2 /mnt/

Now, chroot to /mnt
# chroot /mnt

Change the password
# passwd

Next unmount the partition and enjoy .

# umount /mnt

Thursday, August 13, 2009

Linux troubleshooting

I really like this guy's article. Let me add to this that Linux is not prone to viruses, thus safer, faster and generally better...

Sunday, March 29, 2009

Bulk rename

Yesterday I wanted to rename a lot of files with the same extension (jpg actually). Knowing that linux is case-sensitive, I wanted to rename every JPG to jpg.

So the trick was to simply write
$rename -v 's/JPG/jpg/g' *.JPG

Inside quotes lies the expression that you want to replace (JPG->jpg, 2nd and 3rd argument). Outside the quotes you must give the files that this expression will work on.

Edit:
$rename -n 's/JPG/jpg/g' *.JPG
will get you to see what exactly is going to change. See here for more perl handling, or here for a more understanding way to rename stuff from terminal.

Thursday, March 12, 2009

Change frequency of filesystem check at boot

Sometimes, even though Ubuntu has the option to press cancel, you think that boot fsck happens way too often. I think that every 50 boots it would be great rather than every 20... So I ran df, just to remember the names of the partitions and
sudo tune2fs -c 50 /dev/sdb1

(where sdb1 was my primary partition). In case you want to check every x days,months or weeks there is this neefty parameter
-i interval-between-checks[d|m|w]

. So the command would be something like this(if you want boh the 50 times interval and 1 month),
sudo tune2fs -c 50 -i 1m /dev/sdb1

With this you can see how much time you've got left
sudo dumpe2fs -h /dev/sdb1 | grep -i 'mount count'

and by editing the sixth(last) column in ftsab
sudo gedit /etc/fstab

The 6th column (in bold) is a fsck options.

  • 0 = Do not check.

  • 1 = First file system (partition) to check;  // (root partition) should be set to 1.

  • 2 = ALL OTHER file systems to be checked.

Wednesday, March 11, 2009

Moving Ubuntu to another partition

So, I bought a new hard disc drive and I just wanted to split my windows installation to that of ubuntu. But I didn't want anything to change. I wanted my ubuntu installation to be exactly as it is. No reinstalling, no tweaking from the start. While moving Windows was a pain, ubuntu was very easy to move.

First of all I used this command line
sudo lshw -businfo -C disk

just to see how linux names my partitions. Using also the "df" command I double-checked that my linux partition was indeed located at sda1 and that I wanted to move it to sdb1. After that, I decided to move my partition with this line
dd if=/dev/sda1 of=/dev/sdb1

Watch that I wanted to move my partition from sda1 (the if parameter) to sdb1 (the of parameter). I must say the partitions were not identical, but we'll get to that in a while. Once finished I shut down the PC. Then I disconnected the sda hard disc drive. Here comes the tricky part. Now I don't recall whether or not I used my live cd... But once I got to the terminal (see ubuntu can't find grub), I typed these lines:
sudo grub
>find /boot/grub/stage1

That will answer a thing something like hd(z,0). Note the z number, you will need it. Then type (and replace the z number to that of your own),
>root hd(z,0)
>setup (hdz)
>quit

And that's it. Linux should now load.

In case that the two partitions were not identical, download and burn to rewritable CD the gparted program, then boot from it. Then just resize the linux partition to whatever size you want, and the sizes will fix.